Creating your own libraries can be time-consuming. We’ve created a library for various keypads and thought we’d share this, along with an example sketch to prove it works 😉
You will need:
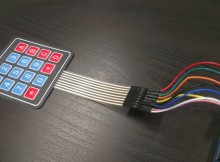
- Matrix Keypad (for this example we’ll use a 4 x 4)
- 8 x Male to Male Cables
- Your Uno
In order for this to work, you’ll need the HCMatrixKeypad library we created. We’ll again use the Serial.print command so that you’re able to quickly see what is output by pressing keys on the keypad.
Making the connections
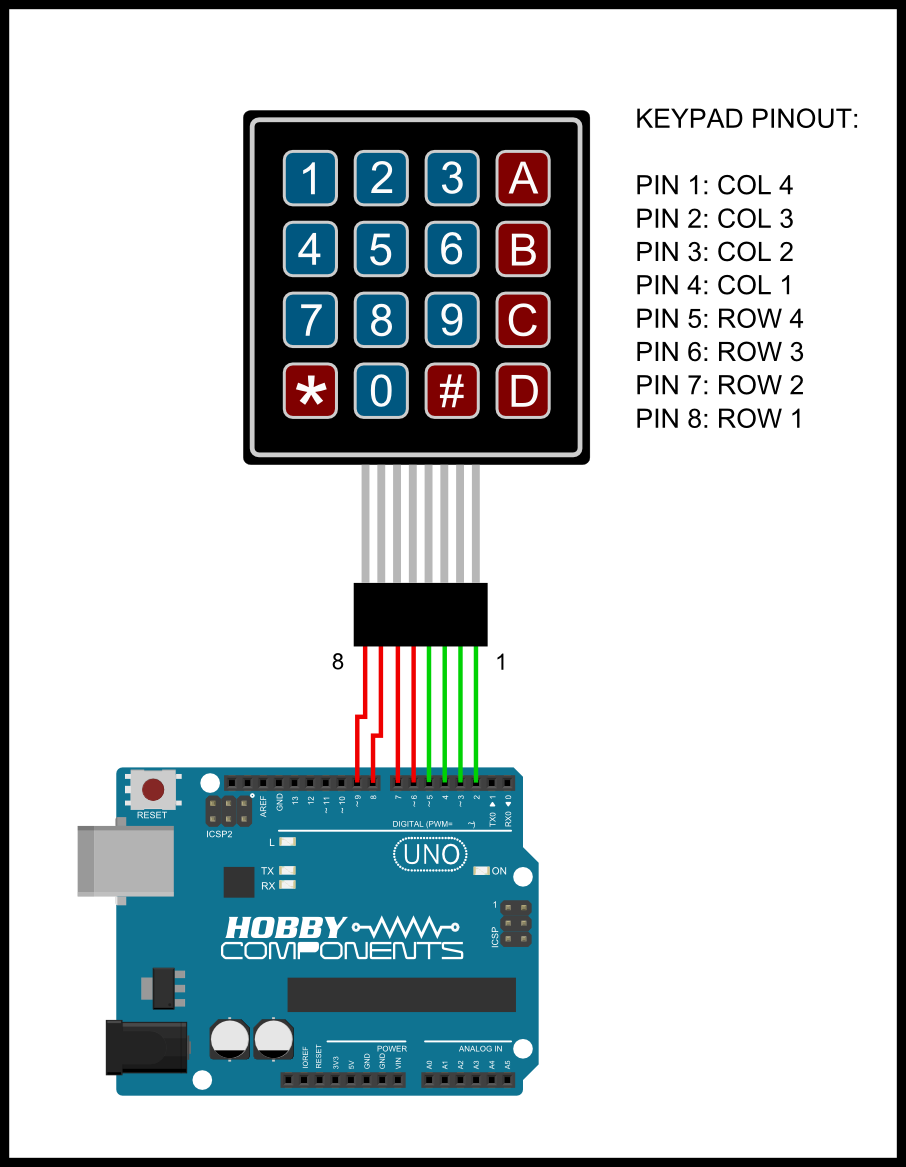
Cable one from pin 1 of the keypad to pin marked 2 on your Arduino
Cable two from pin 2 of the keypad to pin marked 3 on your Arduino
Cable three from pin 3 of the keypad to pin marked 4 on your Arduino
Cable four from pin 4 of the keypad to pin marked 5 on your Arduino
Cable five from pin 5 of the keypad to pin marked 6 on your Arduino
Cable six from pin 6 of the keypad to pin marked 7 on your Arduino
Cable seven from pin 7 of the keypad to pin marked 8 on your Arduino
Cable eight from pin 8 on the keypad to pin marked 9 on your Arduino
Note: Pin one is on the far right hand side of the keypad connector and pin 8 is on the far left.
Make sure the library is placed in the correct folder of the Arduino software. The easiest way to do this if you’ve never installed a library before is to use the Arduino software. Select Sketch > Import Library > Add Library – Then navigate to where you downloaded the file and click add. You should now be able to progress with programming the Arduino with the following sketch.
The Sketch
You can copy and paste the following sketch, or download it here.
[cpp]
/* FILE: HC_Master_Kit_Keypad_Example.cpp
DATE: 14/05/14
VERSION: 0.1
AUTHOR: Andrew Davies
This is an example of how to use the matrix keypad found within the Hobby Components
microcontroller experimenters kit.
KEYPAD PINOUT:
PIN
1……Column 4
2……Column 3
3……Column 2
4……Column 1
5……Row 4
6……Row 3
7……Row 2
8……Row 1
Pin one is on the far right hand side of the keypad connector and pin 8 is on the
far left.
This sketch requires the HCMatrixKeypad library which is included on the CD which came
with this kit.
You may copy, alter and reuse this code in any way you like, but please leave
reference to HobbyComponents.com in your comments if you redistribute this code.
This software may not be used directly for the purpose of selling products that
directly compete with Hobby Components Ltd’s own range of products.
THIS SOFTWARE IS PROVIDED "AS IS". HOBBY COMPONENTS MAKES NO WARRANTIES, WHETHER
EXPRESS, IMPLIED OR STATUTORY, INCLUDING, BUT NOT LIMITED TO, IMPLIED WARRANTIES OF
MERCHANTABILITY AND FITNESS FOR A PARTICULAR PURPOSE, ACCURACY OR LACK OF NEGLIGENCE.
HOBBY COMPONENTS SHALL NOT, IN ANY CIRCUMSTANCES, BE LIABLE FOR ANY DAMAGES,
INCLUDING, BUT NOT LIMITED TO, SPECIAL, INCIDENTAL OR CONSEQUENTIAL DAMAGES FOR ANY
REASON WHATSOEVER.
*/
/* Include the HCMatrixkeypad library */
#include <HCMatrixKeypad.h>
/* Sets how many times the same key must be scanned before it is accepted as
pressed (settled). If you get multiple key presses then increase this value
(max 255)*/
#define DEBOUNCE 10
#define R1 9 /* DIO for keypad row 1 */
#define R2 8 /* DIO for keypad row 2 */
#define R3 7 /* DIO for keypad row 3 */
#define R4 6 /* DIO for keypad row 4 */
#define C1 5 /* DIO for keypad column 1 */
#define C2 4 /* DIO for keypad column 2 */
#define C3 3 /* DIO for keypad column 3 */
#define C4 2 /* DIO for keypad column 4 */
HCMatrixKeypad Keypad(DEBOUNCE, C1, C2, C3, C4, ROWMARKER, R1, R2, R3, R4);
void setup()
{
Serial.begin(9600);
}
/* Main program */
void loop()
{
/* Scans the keypad once. This line needs to be run repeatedly */
Keypad.Scan();
/* Has a new key been pressed */
if(Keypad.New_Key())
{
/* If so the send the key to the serial port */
Serial.print("Key Pressed: Row ");
Serial.print(Keypad.Read() / 10); /* 10’s column is the keypad row number */
Serial.print(" Col ");
Serial.println(Keypad.Read() % 10); /* 1’s column is the keypad column number */
}
}
[/cpp]
Now go to Tools > Serial Monitor in the Arduino software and once this loads up, experiment by pressing different buttons on the keypad to see what the monitor outputs.