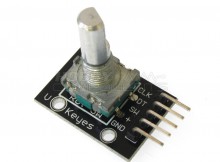
Items you will need:
Arduino development board such as this one
What does it do?
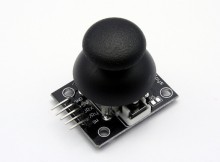
This is a simple example of how to use the HobbyComponents analogue joystick module (HCARDU0019). The module has three outputs, two 5V analogue outputs representing the position of the joysticks X/Y axis, and one switch contact output representing the joystick’s push button. The switch contact has no pull-up and simply connects the pin to ground when the button is pressed therefore a pull-up will be required. This example program reads the status of the analogue and push button pins and outputs the result to the serial port.
Pinout:
PIN 1: Ground
PIN 2: +5V
PIN 3: X-axis
PIN 4: Y-axis
PIN 5: Switch
[cpp]
/* FILE: ARD_Analogue_Joystick_HCARDU0019_Example
DATE: 03/07/12
VERSION: 0.1
You may copy, alter and reuse this code in any way you like, but please leave reference to HobbyComponents.com in your comments if you redistribute this code. This software may not be used directly for the purpose of selling products that
directly compete with Hobby Components Ltd’s own range of products.THIS SOFTWARE IS PROVIDED "AS IS". HOBBY COMPONENTS MAKES NO WARRANTIES, WHETHER
EXPRESS, IMPLIED OR STATUTORY, INCLUDING, BUT NOT LIMITED TO, IMPLIED WARRANTIES OF
MERCHANTABILITY AND FITNESS FOR A PARTICULAR PURPOSE, ACCURACY OR LACK OF NEGLIGENCE.
HOBBY COMPONENTS SHALL NOT, IN ANY CIRCUMSTANCES, BE LIABLE FOR ANY DAMAGES,
INCLUDING, BUT NOT LIMITED TO, SPECIAL, INCIDENTAL OR CONSEQUENTIAL DAMAGES FOR ANY
REASON WHATSOEVER.
*/#define JOYS_VRX_DIO A0 /* Select the input pin for the joystick’s X-Axis */
#define JOYS_VRY_DIO A1 /* Select the input pin for the joystick’s Y-Axis */#define JOYS_SW_DIO 2 /* Select the input pin for the joystick’s push button *//* Initialise serial and DIO */
void setup()
{
/* Setup the serial port for displaying the status of the sensor */
Serial.begin(9600);/* Configure the DIO pin that the joystick’s push button will be connected
to. As it has no pullup we will need to enable the Arduino’s internal pull-up */
pinMode(JOYS_SW_DIO, INPUT);
digitalWrite(JOYS_SW_DIO, HIGH); // turn on pull-up resistors
}/* Main program loop */
void loop()
{
/* Read the current position of the joystick’s X & Y axis via the analogue pins */
Serial.print("X axis: ");
Serial.print(analogRead(JOYS_VRX_DIO));
Serial.print(" Y axis: ");
Serial.print(analogRead(JOYS_VRY_DIO));/* Read the state of the push button and if pressed, output the state to the
serial port */
if (!digitalRead(JOYS_SW_DIO))
{
Serial.println(" Button pressed !");
}else
{
Serial.println();
}
}
[/cpp]

![Simon Says… Wanna Play a [Arduino] Game!](https://blog.hobbycomponents.com/wp-content/uploads/2024/03/BLOG-IMAGE-Simon-Says-150x150.png)
