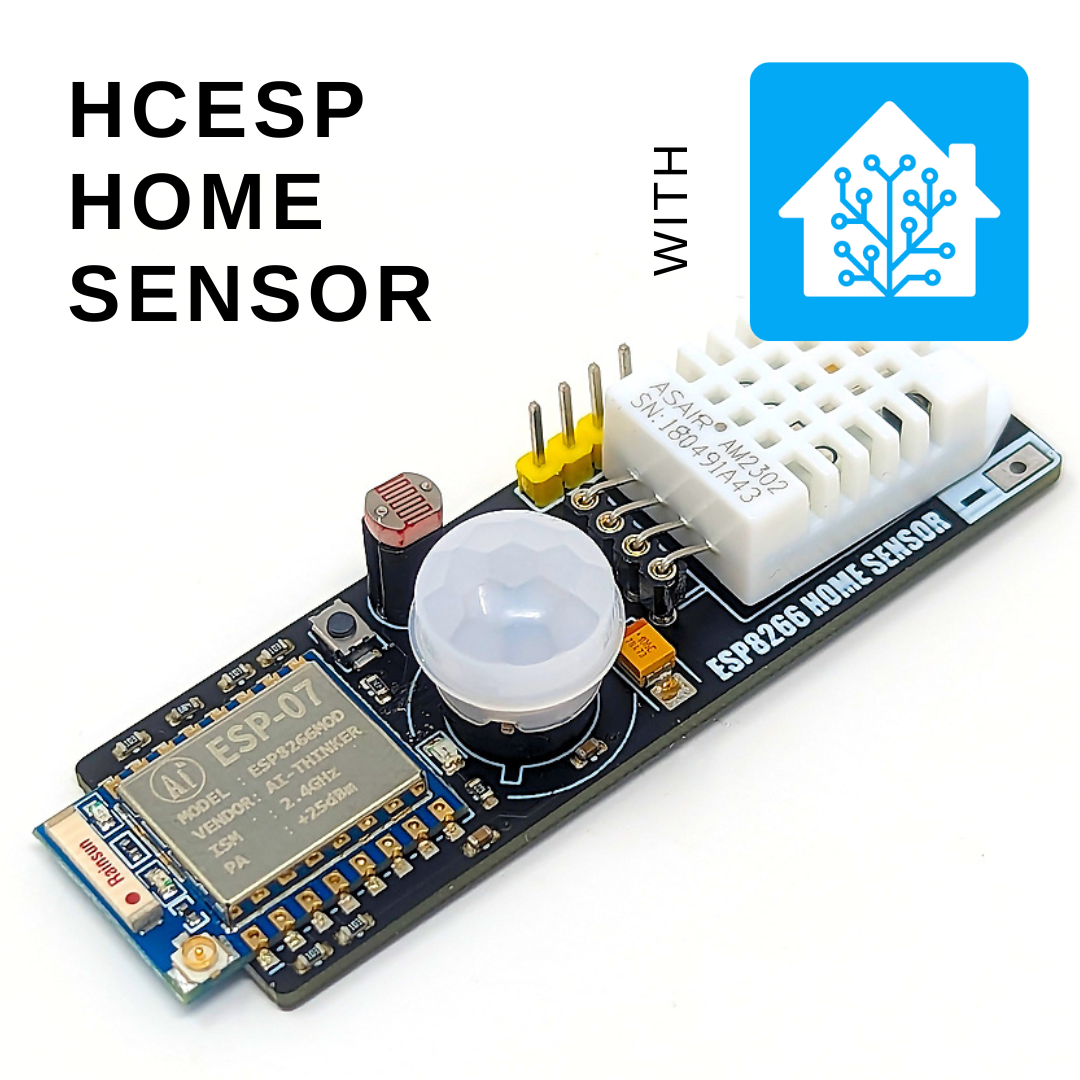
Ever since low cost modules based on the ESP8266 wireless microcontroller came on to the market the ESP8266 has become one of the most popular ways for hobbyists to remotely control their projects. It is the combination of a low cost but powerful wireless ARM microcontroller, combined with the accessibility of the Arduino IDE that has contributed to its popularity.
That said however, the Arduino IDE does not support these modules out-of-the box, but fortunately it does provide an easy way to add board support via its board manager feature. In this guide we will quickly show you how to add support to the Arduino IDE in a few simple steps.
If you don’t already have the Arduino IDE installed you can follow the install guide for your operating system on the official Arduino website here:
https://docs.arduino.cc/software/ide-v2/tutorials/getting-started/ide-v2-downloading-and-installing
Step 1) Adding the ESP8266 github repository to the IDE
In the Arduino IDE click on the File menu and select preferences.
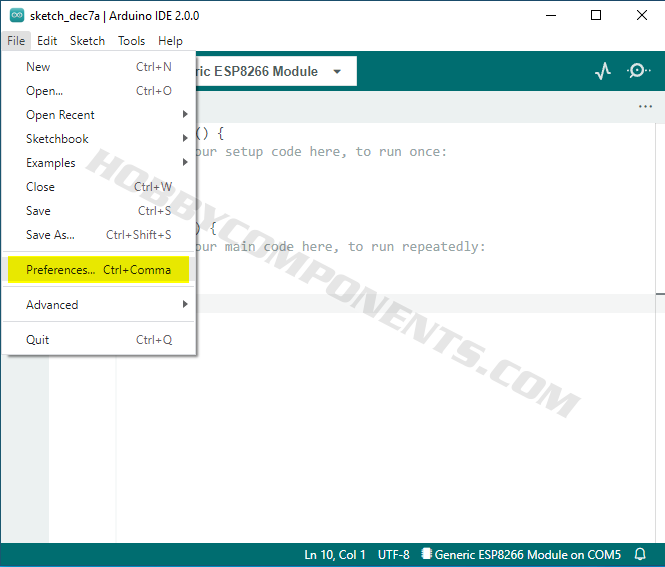
A new window will open up. In this window you will see a text box labelled ‘Additional Boards Manager URLs’. In this text box paste the following URL:
http://arduino.esp8266.com/stable/package_esp8266com_index.json

Note, if you have previously added URLs for other boards in the past then just add the above line to the end, separating it with a comma.
Now close the preferences window and return to the IDEs main window by clicking the OK button.
Step 2) Installing the board files
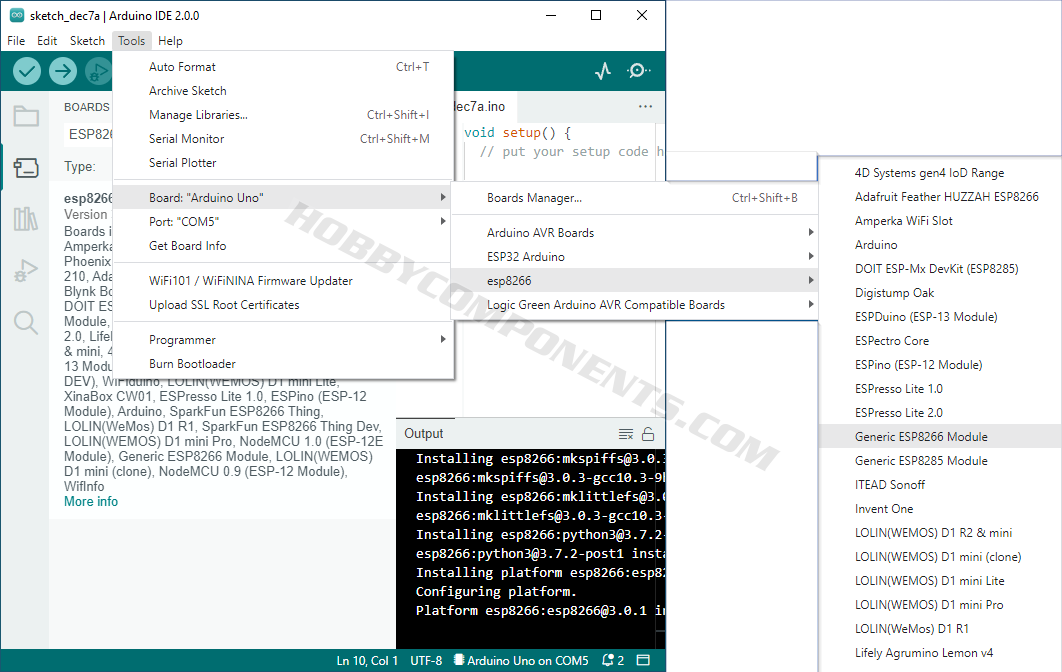
In the IDEs main window click the Tools menu option and navigate to Tools->Board->Boards Manager.

You will now be presented with a list of supported add-ons down the left hand side of the window (for IDE versions < V2.0 this will be presented in a new window).
In the search box found at the top of the list, type ESP8266 to find the board files for the ESP8266.
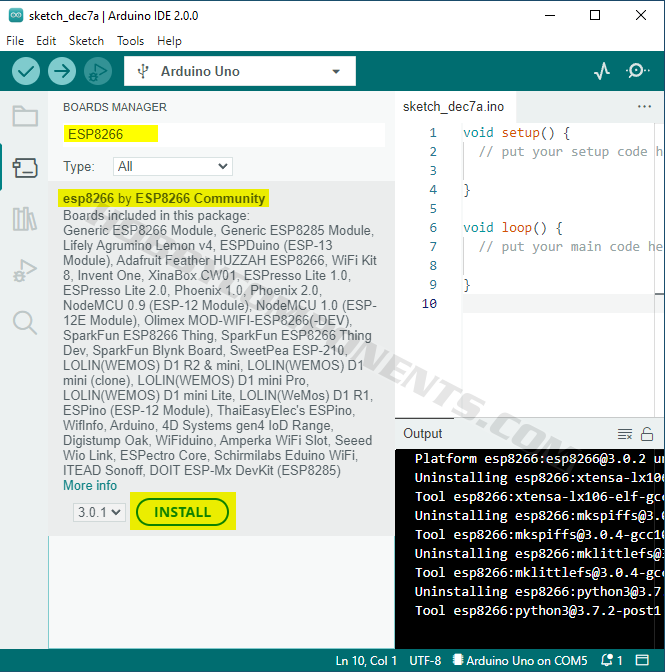
Once located, click the install button. Board support for the ESP8266 will now be installed. Depending on your internet connection this may take a few minutes.
Once the IDE has finished installing the files you will now find there are additional ESP8266 board options under the Tools->Board menu option.
Step 3) Selecting the correct settings for your board type
There are many variations of ESP8266 development boards and modules so what setting you require will greatly depend on the version of ESP8266 board/module you have.
The first step would be to check the list of installed board types under the Tools->Board->ESP8266 Boards (x.x.x) menu option to see if yours is listed. If you don’t see it listed then you’ll probably need to select the ‘Generic ESP8266 module’ option.

If you have selected Generic ESP8266 for the board type then you’ll also need to manually configure the rest of the board type options found under the tools menu. To figure out what these options need to be, the first step will be to check your supplier to see if they have provided any specifications or settings such as flash size, crystal, CPU and flash frequency, etc. If you still have no luck then try the common generic settings below:
Board: Generic ESP8266 module.
Port: The COM of your ESP8266 board, or the port of the USB interface
module if a separate USB serial adapter is required.
Crystal Frequency: 26MHz.
Flash Frequency: 40MHz.
Flash mode: DIO.
Reset Method: dtr.
Upload Speed: 115200.
Flash Size: 1MB (FS64KB OTA:~470KB).
CPU Frequency: 80MHz.
For the rest of the settings you can usually leave them set to their defaults.