Our popular ESP-ARGB modules are now being shipped with the WLED firmware already installed. Don’t panic those of you who have purchased these previously, we’ve added a forum post telling you exactly how to flash the firmware into the one you already have. You can see that post here.
For those of you that don’t currently have the module, you can purchase them here.
Connecting the ESP-ARGB Module to Your Light Strip and Power Supply
The following diagram is a visual for connecting the module to a 12V supply and a RGBW LED strip.
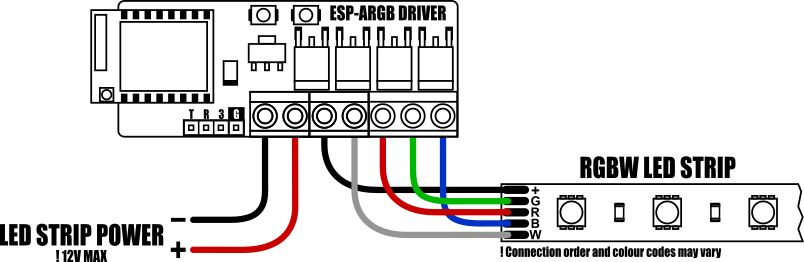
The module can drive 5V and 12V RGB light strips at up to 2A per channel.
For anyone that can’t work out the connections from the diagram they are:
- + to terminal 3
- G to terminal 6
- R to terminal 5
- B to terminal 7
And if your light strip has an additional white input (shown as “W” in the diagram), this can be connected to the drivers aux terminal. Terminal 4.
You can then use a single power supply for both the module and the light strip using the modules + and – screw inputs. This must match your light strip.
All connected.
Configuring the WLED firmware.
Once you have connected the module to your light strip and power supply you will then need to configure the WLED firmware by following the steps below:
- Connect power to the module. You should notice a blue LED on the module illuminate.
- Using a mobile phone, pull up a list of available access points. Within this list you should see an access point named ‘WLED-AP’. This is your ESP-ARGB module.
- Tell your phone to connect to it by selecting it from the list and when it asks for a password enter: wled1234

After pressing enter, you should be diverted to a welcome page as shown here:

4) Click the “WIFI SETTINGS” button and the following screen will appear.

In the wifi settings page you will need to enter the SSID and password for your wifi router. You can either enter your routers SSID manually or press the scan button to bring up a list of available access points.
If your router has both 2G and 5G options make sure you select the 2G option.
Once you have entered your router login details click the save and connect button at the top of the page and it should now connect to your network.
- Now that the module is connected to your network you can access it directly by typing its IP address into a browser. However, the easiest option is to install the WLED app by downloading it via the Apple app store or the Google play store depending on whether you have an Apple iPhone or Google Android phone.
- Open the app or browse to the modules IP address and you should see the following welcome screen:

7) The welcome screen is where all the WLED devices on your network will be listed, but as this is the first time we are adding a device there are none in that list. To add the ESP-ARGB module click the + button in the top right hand corner and in the new window click the DISCOVER LIGHTS button.
The app will scan your network for the module. Once it has found it, click the tick button in the top right of the screen.

8) In the next screen you should now see the module listed as WLED.
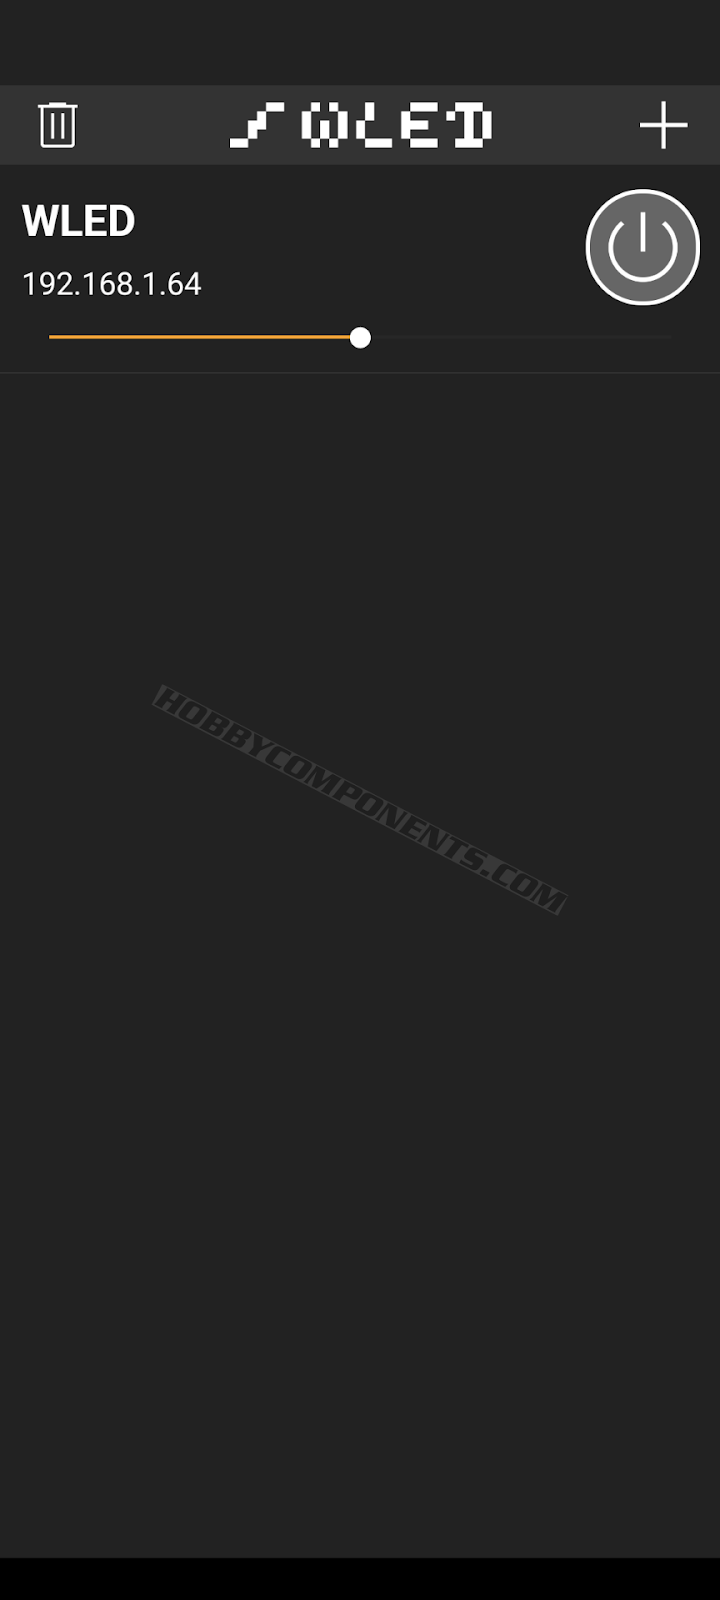
9) Select it and you will be taken to the main area for the module where you can set the colour and animations for your LED strip.
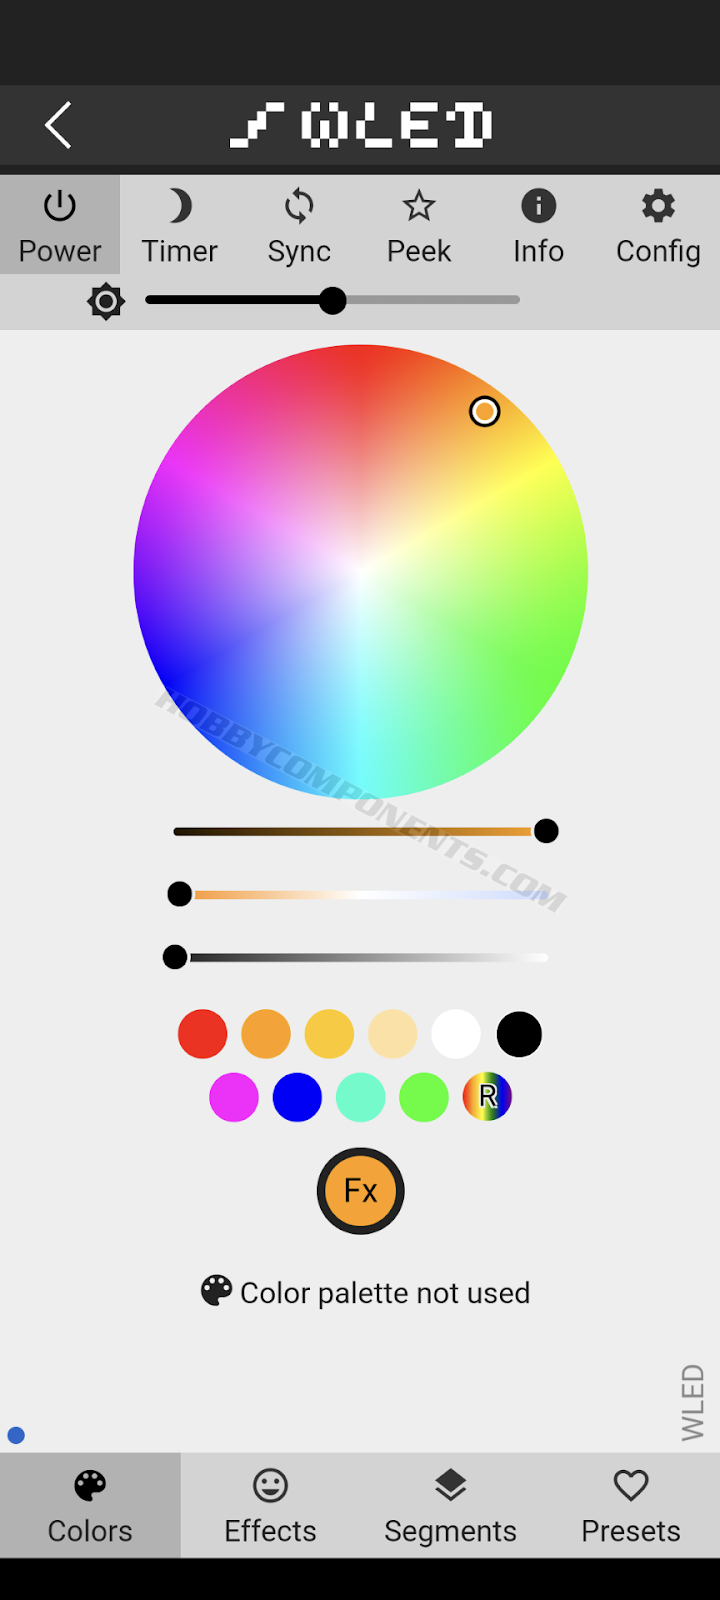
However, before you can control your LEDs you will first need to tell the module what type of LED strips you are using. To do this, go to the settings screen by clicking the config gear icon found in the top right hand corner of the screen.
The settings screen below should then appear:
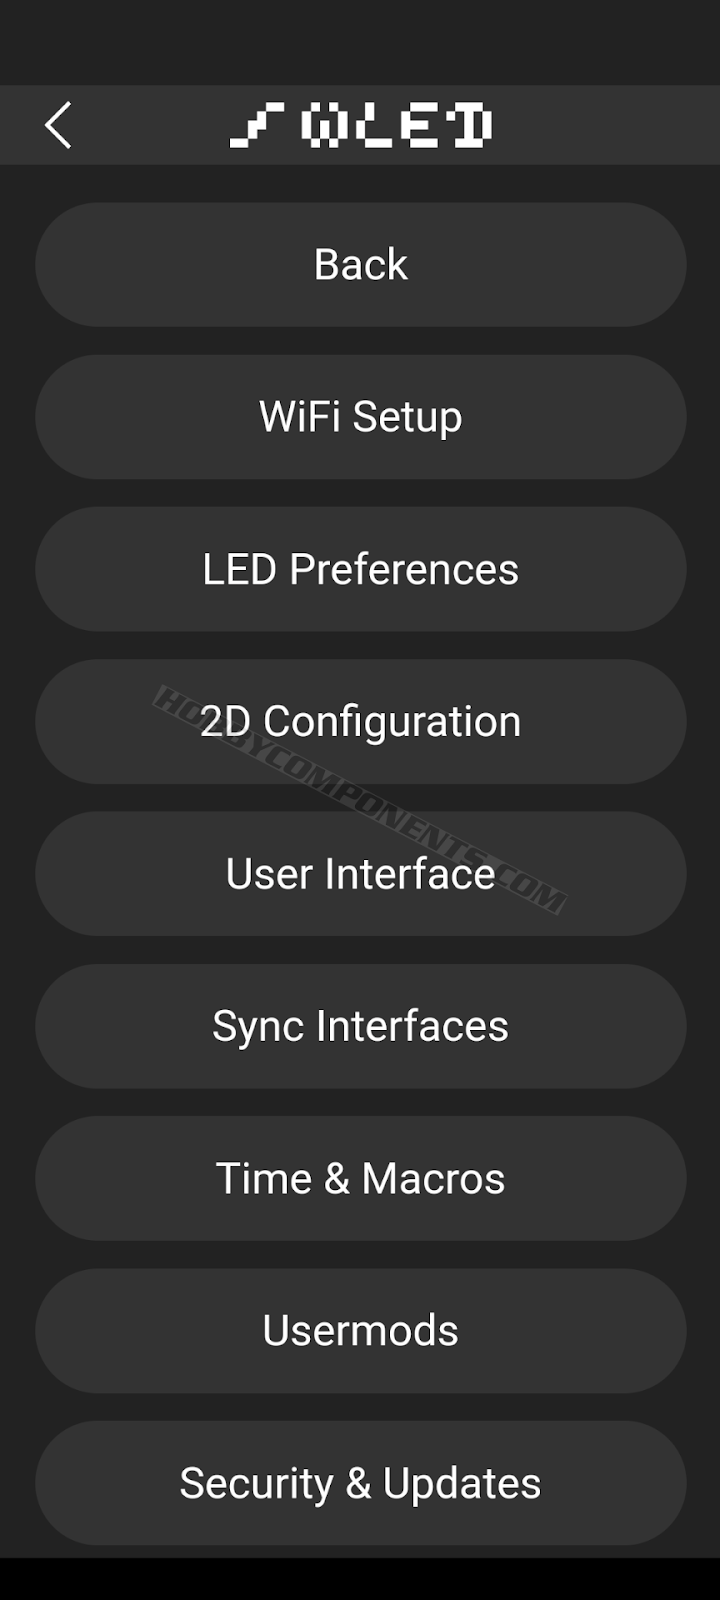
10) In this settings screen, click the LED preferences button.

11) In the LED preferences screen scroll down to the section titled ‘LED outputs’.
In this section there is a dropdown selection box. From this list select either PWM RGB if you have a RGB LED strip, or PWM RGBW if you have a RGB+W LED strip.
For the GPIOS enter the following pin numbers into each box from left to right in the following order:
For PWM RGB enter 13, 12, 5
For PWM RGBW enter 13, 12, 5, 4
Click save and you can now exit the settings menu by clicking the back button.
Your module should now be set up and ready to use.
Click the back arrow in the top left hand corner of the screen twice to exit the settings.
While you’re here!
Don’t forget we’ve also released files on thingiverse for a 3D printed custom case for the Hobby Components ESP-ARGB Controller. These can be found here: