Access your microcontroller from anywhere in the world
(Part 1)
Microcontrollers are an amazingly cheap way to automate and control the world around you, but in a world where a Wi-Fi connection is available almost anywhere it has not always been as proportionally cheap to get your microcontroller project connected to the outside world. That is until the availability of the ESP8266 based Wi-Fi modules that, for just a few pounds, can turn any microcontroller with a serial interface into a fully Wi-Fi enabled client, or even a server. This opens up a whole new world of possibilities, such as low cost remote sensors uploading data to your website, piggybacking off an existing Wi-Fi network to pass information from one node to another, or scraping weather information from a website so that your micrococontroller knows if its going to rain today.
In this article we will be going through the basic steps of how to communicate with one of these modules, in particular the ESP-12.
What will be required for this guide:
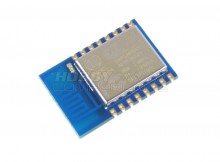
ESP-12 Wi-Fi module (HCMODU0077) available for purchase here.
A 3.3V USB to serial interface available for purchase here.
A PC running Windows/OSX/Linux with a serial terminal program.
Before we start there are a few things to consider:
![]() The module operates at 3.3V and is not directly compatible with 5V microcontrollers. Therefore, if you plan to connect it to a 5V microcontroller we recommend using a level shifter to the Tx and Rx pins. Peak current requirements of this module can also be quite high depending on the mode of operation. A typical current requirement when a Wi-Fi connection is established will be around 70mA, but when transmitting can peak at close to 200mA. You should therefore make sure your application is capable of handling these peak currents. A large capacitor (100uF) across the VCC and GND pins will help with peak current requirements.
The module operates at 3.3V and is not directly compatible with 5V microcontrollers. Therefore, if you plan to connect it to a 5V microcontroller we recommend using a level shifter to the Tx and Rx pins. Peak current requirements of this module can also be quite high depending on the mode of operation. A typical current requirement when a Wi-Fi connection is established will be around 70mA, but when transmitting can peak at close to 200mA. You should therefore make sure your application is capable of handling these peak currents. A large capacitor (100uF) across the VCC and GND pins will help with peak current requirements.
The module itself actually contains a 32 bit microcontroller which, by reprogramming, can be used as a stand-alone Wi-Fi enabled microcontroller. However, the module comes pre-flashed with a serial to Wi-Fi bridge application. This application allows the module to be used as a simple slave device to your own microcontroller project with very little effort. To communicate to the module in this way, all you need is a spare hardware or software (emulated) serial port on your microcontroller.
That said, to keep things simple for the purpose of this guide we are not going to be using a microcontroller to communicate with the module, but instead a USB to serial adaptor so that we can configure and pass data to the module directly from a PC using a terminal program. To do this you will need a 3.3V interface such as a 3.3V FTDI cable, or in the case of this guide, a CP2102 USB adaptor (see below for links).
Connecting to a PC:
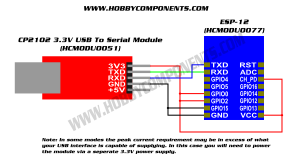
Connect the module to the USB adapter as shown.
In the above diagram we need to connect a 3.3V supply across the VCC (+ve) and GND pins. Additionally, the CH_PD pin is used to put the module into a low power standby mode when pulled low. This should be connected to VCC during normal operation. There are also 3 IO pins (GPIO0, 2, & 15) which are used to configure the module. These need to be connected to VCC or GND as in the above diagram so that we can communicate with the module via the serial bridge application. Notice also that the Tx and Rx connections to and from the module are crossed over. i.e. Tx → Rx and Rx → Tx.
In this guide we are going to be using a PC running windows and a serial application.
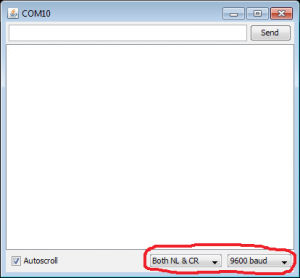
By default the module communicates at 9600 BAUD with 8 data bits, one stop bit, and no handshaking. All data sent to
the module must be proceeded by both a line feed (LF) and carriage return (CR). In the image above we are using the Arduino serial monitor, which is included in the Arduino development environment, as it is a simple terminal client and already installed on our test system. You can reference the above image for correct settings. Make sure you set the COM port to the correct one for your USB interface.
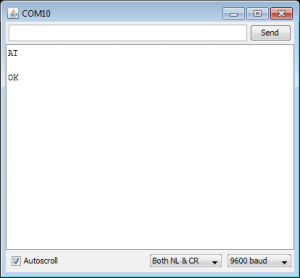
We can test the connection to the module by sending the command ‘AT’:
If all is working well the module should respond with an ‘OK’. If not then check your connections and settings. In particular, check that you have Tx and Rx crossed over and that you have your terminal program configured to tag on a CR+LF after each command.
Part 1) Connecting the module to your Wi-Fi network as a client:
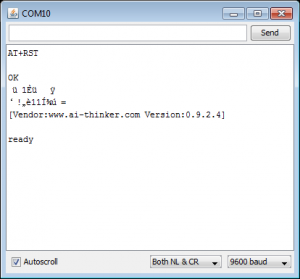
First of all, let’s make sure the module is in a known state by issuing a reset command AT+RST:
The module will respond as above. You may see some garbled characters but this is normal. It will then report the firmware version and a ready prompt.
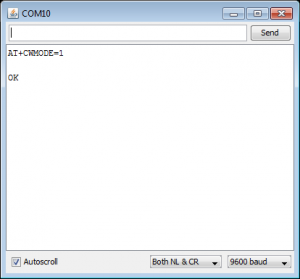
The module can act as client (1), server (2), or both (3). In this example we will be requesting a web page as a client, so let’s set the module to this mode with the command AT+CWMODE=1
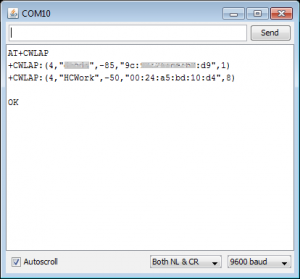
Now let’s connect to a Wi-Fi network. We can get a list of available access points by issuing the command AT+CWLAP
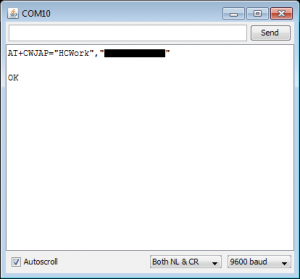
In the above example there are two available networks. We will be connecting to the one with an SSID of ‘HCWork’ with the AT command AT+CWJAP=”HCWork”,”PASSWORD”. Change the SSID and password parameters to match your access point.
It will take the module a few seconds to connect, but once connected it will respond with an ‘OK’. We are now connected to the access point.
Part 2 of this series covers requesting a web page over a TCP connection.

![Simon Says… Wanna Play a [Arduino] Game!](https://blog.hobbycomponents.com/wp-content/uploads/2024/03/BLOG-IMAGE-Simon-Says-150x150.png)




One thought on “Access your microcontroller from anywhere in the world for a few pounds (Part 1 of 3)”