Access your microcontroller from anywhere in the world
(Part 3)
Basic server example
In this example we are going to configure the module as an access point so that Wi-Fi clients such as PCs, tablets, or smartphones can directly connect to it. We can then serve a very basic web page to the connected client.
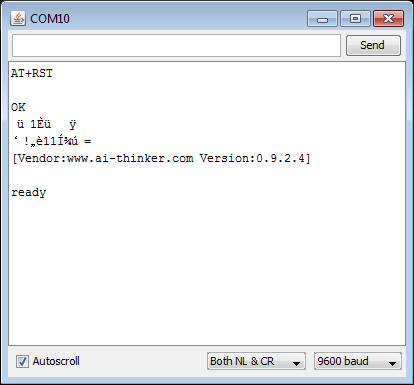
As in part 2, let’s start by resetting the the module so that it is in a known state by using the command AT+RST:
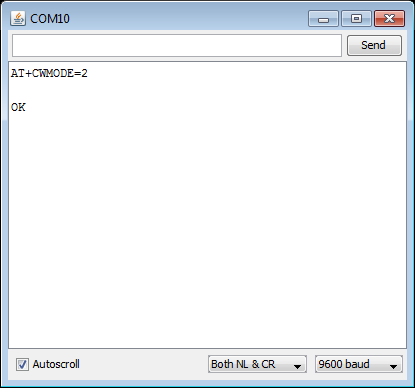
This time we need to set the module as a server (mode 2) with the command AT+CWMODE=2
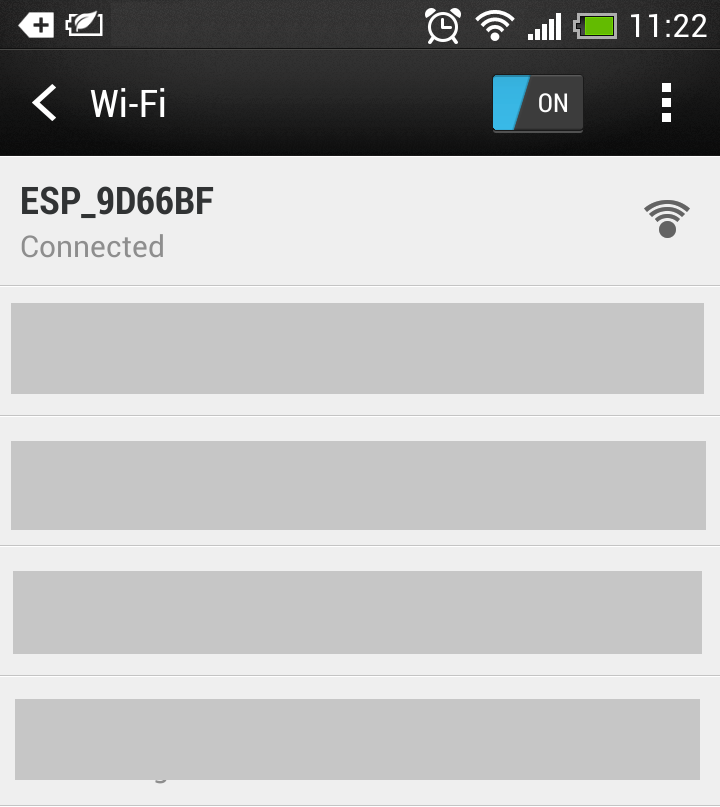
The module should now be visible to any Wi-Fi client such as a PC, tablet or smartphone. In this example we are using an Android smartphone. The module is showing an SSID of ‘ESP_9D66BF’ as an open Wi-Fi network:
Connect to this network with your Wi-Fi client in the same way that you would connect to a normal access point.
We are now acting as an access point, but to allow a client to make a TCP connection we have to enable the module as a server. First of all we will accept multiple connections with the command AT+CIPMUX=1

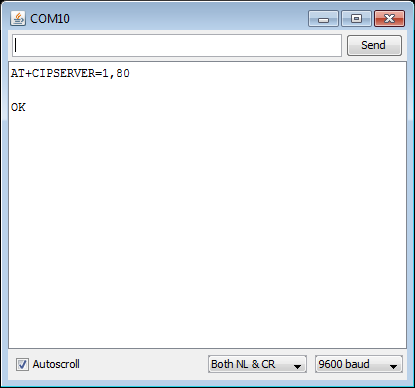
Now we can enable the server to accept connections on port 80 using the command AT+CIPSERVER=1,80
The module will usually have a default server address of 192.168.4.1 but we can confirm this with the command AT+CIFSR

Now, open up a standard web browser on your connected client and browse to this address. You should see something very similar to the image below in your terminal window:
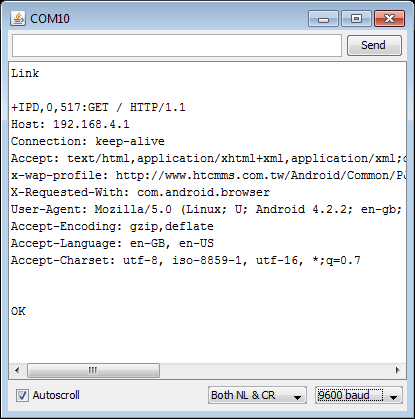
This is the web browser on your client making a request to the server on your module. The header information you can see is the browser giving details about what type of client it is. In some cases this can be useful information, but for our simple example we are going to ignore this. One thing to note at this point is that your client is currently waiting for a response from the server. Depending on the client it will only wait for so long before giving up and disconnecting. If you see the word ‘UNLINK’ appear in the terminal window this means the connection has timed out and you will need to refresh your web browser to open up a new connection before continuing.
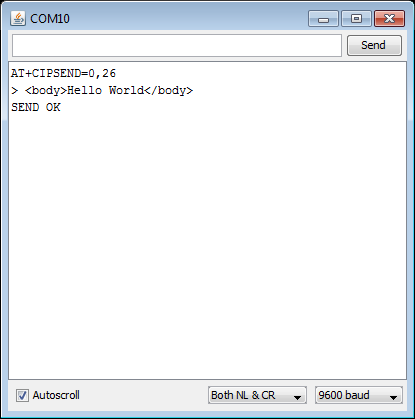
We are now going to send a very simple response to the browser. Normally we would respond with some header information that would give the browser more information about what we are about to serve to it. However, most browsers will tolerate skipping this information and so we will just simply send a line of HTML. First of all we need to tell the module how many bytes (one byte per character) of data we are going to send. Remember that we need to add an extra two bytes for a Line Feed and Carriage Return. Paste the following command into your terminal. This tells the module we wish to send 26 bytes to the connection ID 0: AT+CIPSEND=0,26

The module will respond with a ‘>’ which signifies that it is waiting for the 26 bytes of data. Paste the following HTML code: <body>Hello World</body>
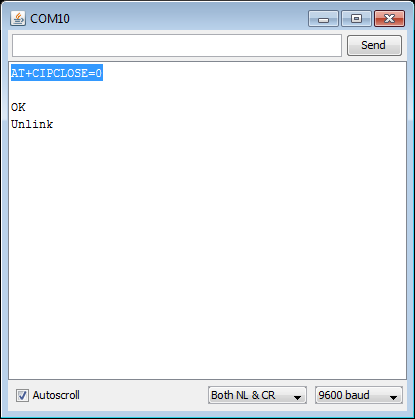
Now lets close the connection with the following command AT+CIPCLOSE=0
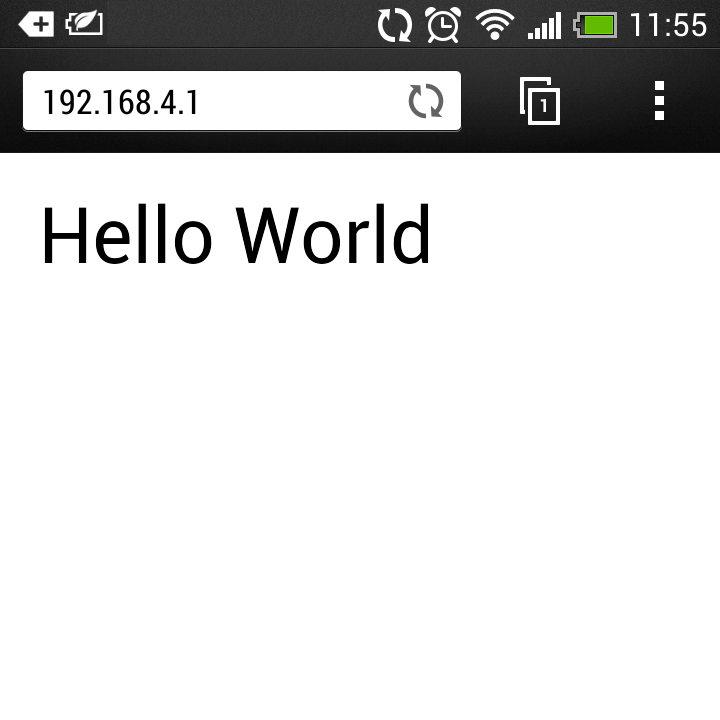
Your browser should now be displaying the HTML code we sent to it:
This concludes our guide, which hopefully has given you a much better idea of how the module works and it’s capabilities. In particular how the module can be configured in different combinations of client and server. Although in the above examples we have used the module with HTTP connections, you can use the module for making any peer to peer TCP or UDP connection for passing whatever data you wish.
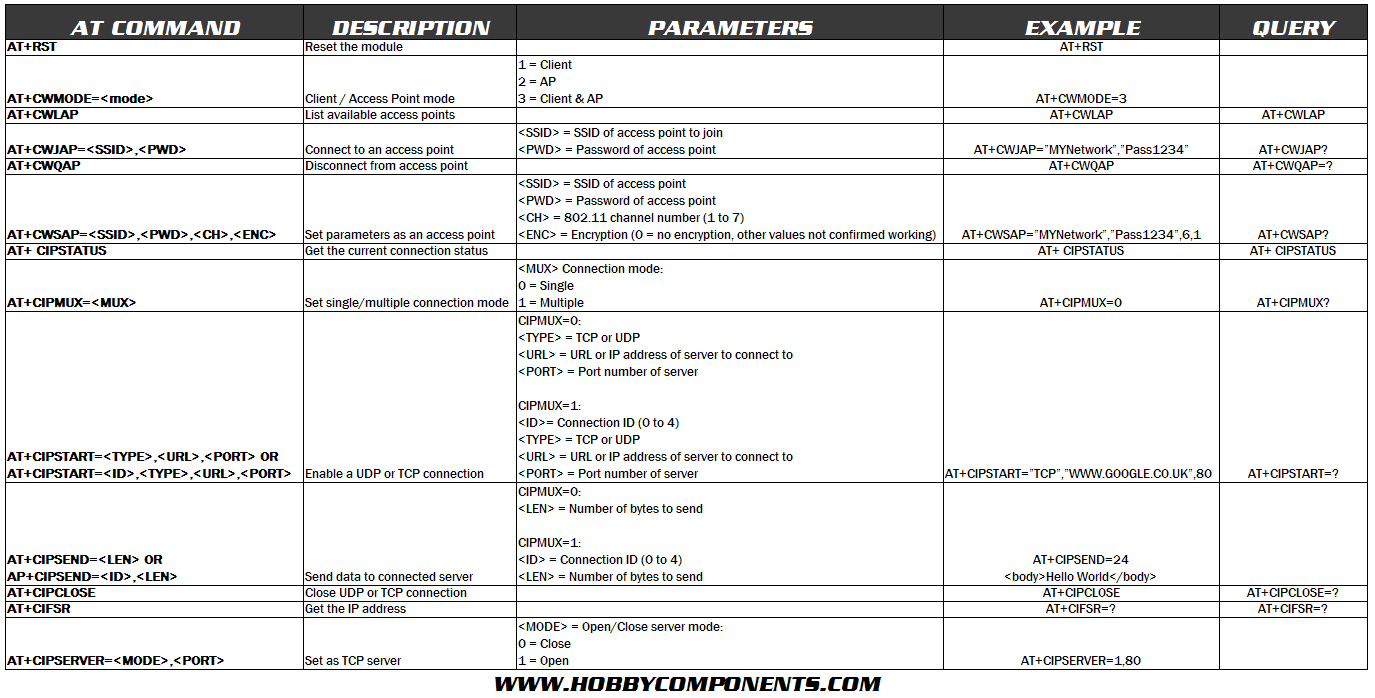
You can reference the table below for a more complete list of AT commands available.