Access your microcontroller from anywhere in the world
(Part 2)
Requesting a web page over a TCP connection
Now we are connected to the world, let’s try requesting a web page from a website on the internet (Google). First we need to connect to the server that will be serving the page we require using the command AT+CIPSTART=”TCP”,”google.co.uk”,80

In this example we are opening a TCP connection to the Google search engine, which is on port 80. The module will respond with ‘OK Linked’. We are now connected to the server and can request an actual web page by sending a TCP GET request to the server. To do this we first need to tell the module how many bytes of data we are going to send over the TCP connection to the server. We will be sending a total of 30 bytes, including two bytes for the LF+CR, with the command AT+CIPSEND=30

The module will respond with a ‘>’, indicating that it is now waiting for the 30 bytes of data to pass over the TCP connection. We will be sending the following GET request over the TCP connection to the Google server:

What just happened?!?
If issued correctly, your terminal window will now be full of what appears to be HTML information similar to the image above. What you are seeing is the actual response from the Google server with the requested web page. In this example it is the standard google search page. Although we are connected to a Google search page this could of course be a web page from any server containing more relevant information to your project. Also, keep in mind that all you are doing is creating a TCP connection to a server, which, although in this case happens to be a web server, can be any kind of server capable of passing data over a TCP or UDP connection. Instead of a server sending a complete web page, it could simply be your own server sending the command ‘LIGHTS ON’.
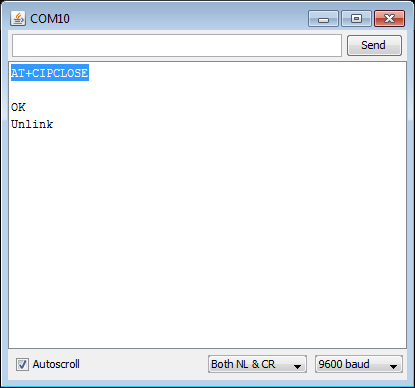
To complete this example lets close the connection by issuing the command AT+CIPCLOSE
The final part of this series (Part 3), is a Basic server example.